
CorpLine® Dynamic Homepage › Forums › Installation Instructions › Other Services Installation Settings › Google reCAPTCHA Installation Guide
Tagged: Mobile
- This topic is empty.
-
AuthorPosts
-
February 17, 2023 at 4:07 pm #7420
corplinewebmanagement
KeymasterWhat is Google reCAPTCHA?
Google reCAPTCHA is a free, Google-developed service that protects websites from spam and abuse by separating human users from bots. It is a more advanced version of the traditional CAPTCHA system using machine learning and advanced risk analysis.
The Turing test is a method for determining whether computers exhibit human-like behavior. Such behavior is reviewed by reCAPTCHA and is often used to prevent misuse of registration, contact forms or comment sections.
There are multiple types of CAPTCHA tests that can be implemented with a real-life image or a simple checkbox.
What You Need for Installation
In this guide, we’ll look at how you can improve your security by integrating Google reCAPTCHA into your website. For this, you will first need a Google account. You should connect to the reCAPTCHA admin panel with a Google account and select the most suitable reCAPTCHA type for you and create it. You can integrate the created reCAPTCHA into your website in “2” different ways.

0- Generate your reCAPTCHA from Google Panel (It Should Be Done For Both Ways!!)
There are different types of reCAPTCHA tests available. You should choose the most suitable type for your site. We recommend that you consider what type of testing would be best for your visitors and user experience.
To Create a reCAPTCHA: https://www.google.com/recaptcha/admin/
Then you have to decide where you want to insert the test. reCAPTCHA services are often found alongside online forms such as registration or contact pages. Knowing the location of the test in advance helps the setup process.
The first step in any reCAPTCHA setup is to get the API key pair from the reCAPTCHA admin panel.
Once you’ve done that, fill out the form based on your website needs:
- The Label can be anything you want and is used to distinguish your reCAPTCHAs.
- Select the type of reCAPTCHA you want to use on your website.
- It is possible to add more than one website. This can be done in the Domains section.
- As a Google tool, the email under Owners will be automatically selected to your Gmail account. You can change or add more email addresses if needed.

After completing the form, click the Submit button. Google generates a site key and a secret key. Use the site key in your site’s HTML code and the secret key for communication between your site and reCAPTCHA.
Once you have the site key and the secret key, the next step is to install.
1- Manually Install reCAPTCHA (Requires Partial Technical Knowledge!)
One of the ways to set up reCAPTCHA on your own is to use a PHP or HTML file. The first step is to access the root folder of your website. Then add the following code to the header of your form’s PHP or HTML file, preferably after the “title” line:
<script src="https://www.google.com/recaptcha/api.js" async defer></script>
In the same file, paste the following code into the form, before the submit line:
<div class="g-recaptcha" data-sitekey="YOUR-SITE-KEY"></div>
Replace YOUR SITE-KEY with the Site Key provided by Google. Be sure to keep the key in quotation marks.
Next, add the secret key to the DNS records. If you are working with CorpLine Dynamic, report this to our customer representatives. They will quickly complete this process for you. If you’re working with a different provider, go to your domain’s DNS Domain Editor. In Manage DNS Records, add your secret key under Name to data-sitekey and TXT. Click the Add Record button.

Note that it may take up to 24 hours for the changes to apply.
2- Install reCAPTCHA Using a Plugin (For WordPress Only!)
Installing reCAPTCHA using a plugin is a simple process. But note that this option is only available for WordPress users.
To add the test to your websites and forms, first manually install a WordPress plugin for reCAPTCHA. There is no official reCAPTCHA plugin, although there are several plugin options available to add the test.
Go to Control Panel -> Plugins -> Install Plugin to search for all available reCAPTCHA plugins. Enter the reCAPTCHA search box. Most of the search results appear as contact form plugins.

Before choosing the plugin, make sure it is compatible with your WordPress version. For this example we will use the Contact Form 7 plugin.
The Contact Form 7 plugin has the option to integrate reCAPTCHA protection into all its forms. To do this, go to Dashboard -> Contact -> Integration after installing and activating the plugin. Under the reCAPTCHA section, click the Setup integration button.

Add the site key and the previous secret key here. When you’re done, click the Save Changes button. Press the Setup Integration button again.

Once the integration process is complete, WordPress will show you two keys.

Then go to Admin Dashboard-> Contact -> Add New to add required information for the form. To differentiate between forms, add a title in the Enter title here section.
After editing the content of the form field, add “[recaptcha]” before the “[submit “Submit”]” line. Click the Save button. You’ll see a shortcode appear under the title.

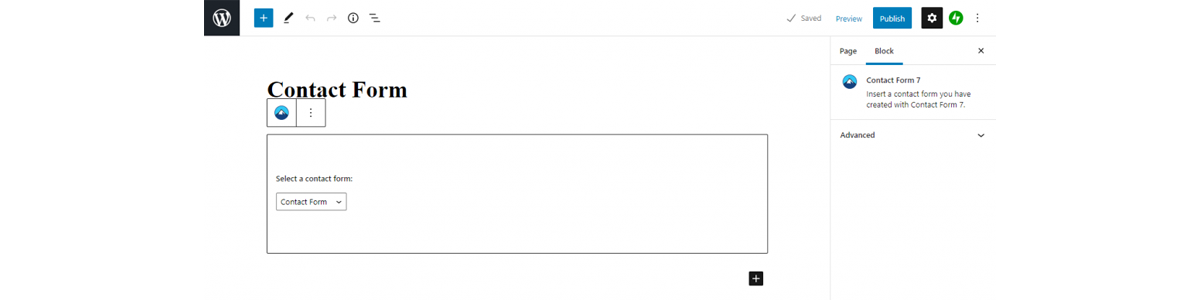
Copy the shortcode and go to the WordPress editor to add the form field you created. In any editor, for example the Gutenberg editor, simply paste the shortcode; The form is automatically added and as a result your reCAPTCHA test is integrated.
Congratulations! You have successfully integrated Google reCAPTCHA into your website! You can now execute highly secure and verified form transactions. But keep in mind that using Google reCAPTCHA has both advantages and disadvantages. While the test helps identify bots, it worsens your visitor’s user experience.
Having Problems? Don’t Worry!
*** If you experience access problems, please contact the CorpLine® Support Team. Our teams will be standing by to assist you! Don’t forget that our services work with 99.99% uptime! We are here for every remaining moment.
Source: Hostinger, Google, CorpLine® Support Team
-
AuthorPosts
- You must be logged in to reply to this topic.
